Calgary Teferi Primer

This is a cEDH version of Teferi designed for and tested in the Calgary cEDH meta. While I encourage everyone to actively participate in cEDH to the best of their abilities, I will also mention that this is not a budget build, and that I don't intend to make budget substitutions as part of this discussion. What follows is a frank and honest primer from having played Chain Veil Teferi (CVT), in a highly competitive metagame, for about three years. Enjoy!

Calgary has a healthy, vibrant cEDH metagame. We consistently get eight to twelve players a night for our league, and the decks those players bring are built to the highest possible standard for that player. We have no extra banned cards, we have no altered rules, and we play to win. On a given night, you can expect to face off against a good range of high-tiered, well-known decks, such as Food Chain, Flash/Hulk, or Captain Sissay. In this type of environment, you must be prepared for the full range of threats that are coming your way. And trust me, there are many.
Know the Format: An important aspect to success in cEDH is to know the deck you're playing and how it is likely to react inside your metagame. It's important to know, not only the cards that are in it, but also, how it's designed to play out, so as to maximize your output in every game you play. After three years of playing Teferi, I can safely tell you that he's a beast. Until the First Sliver came out recently, Teferi was arguably the best, general-purpose deck in the format. His biggest asset in the game is that he's fast and slick, which allows him to transition between roles on the table with surprising efficiency, and catch people off guard with a timely counter, or a 'bounce' spell. This enables the Teferi player to 'pick a window' to try and leverage openings in the game to create board state. Make no mistake, while you can take on the counter role at the table, you don't generally want to. With Teferi, you are fundamentally playing a tempo/combo deck, and I have always found that the deck responds very well to playing that style. Be selfish and greedy with EZ_T. The table will show you no mercy.

Know the Deck: It should go without saying, but I'll say it anyways. Be very careful about which window you choose through which to actually win. The combo itself is a little mana-hungry when you first 'run the loop', and you don't want to come up short if you find yourself in a counter war. One aspect of Teferi that is rarely discussed is that, as a mono-blue deck, there isn't necessarily all that much interference from most of the 'Blood Moon' type of effects, and that's actually a huge advantage for you. You're very inert with Teferi, and while that literally leaves you quite open most of the time, that openness is rarely capitalized on fully, as, most of the time, you generally don't have to reveal which particular direction you intend to go with the game until it's actually time to go there. What this affords you in the long-run is the ability to 'perch' on a game, or to literally just sit there. With Teferi, I have found that the easiest road to consistent success is to exercise this ability to 'perch' as often as you can, wait for that one big window, then explode with overwhelming advantage into the win. Unless you really got it, plan to go off second. Your counters will help draw out other counters while someone else is going off, and your selfish planning will generally leave you with at least one ace up your sleeve for when the time is ripe.

Know your Role on the Table: As I mentioned earlier in this primer, a large part of Teferi's success has to do with his ability to play a potentially very fast, transitional game. With access to all of the legal 'rocks' in the format, you can generally produce copious amounts of colourless mana in the early to mid-game, and then use this mana to power out some incredible bombs, or some powerful lock pieces, depending on your context. You also have access to an interesting suite of counters and 'bounce' spells that give you a fair amount of control over the game. Don't be afraid to use these, but I recommend adopting a selfish planning style in terms of how you dispense with justice. WHEN PLAYING WITH TEFERI, ONLY DO THINGS THAT DIRECTLY BENEFIT YOU. Remember, you are playing a uniquely inert deck. You will find that many things impact you far less than they are impacting other people on the table. Learn to assess threats from a global perspective with this deck, and you can unlock the full potential of its inertness. Trust me, it's great.

Now, that said, there are some things to watch for, and a few things that you simply need to counter as soon as you can. Obviously, any Null Rod type of effect will ruin your deck. It's not impossible to come out from under a Null Rod, but you definitely will have to do so, as none of your combos actually work with any type of Null Rod in play. You need to deal with this. That said, avoid the temptation to pop the Null Rod too soon. Unless you have an accompanying wheel effect, or a hard counter on stand-by, you simply won't get the long-range effect that you're looking for by bouncing a Null Rod too soon. You'll simply have to slog along until you get your ducks in order, create an opening, then hope you planned everything correctly. Null Rod effects are by far the nastiest thing you'll have to deal with when playing Teferi.

Rule of Law effects are interesting for Teferi, and their impact largely depends on the table. If you find that you're the only deck with counterspells sitting under someone else's Rule of Law, that's not necessarily a bad thing. The context here is that you get to play a true 'permission' role with the deck, and can really take advantage of how you're put together. Generally, in this context, you'll find that you have bigger bombs than most of the other players, so, turn by turn, your board state is expanding much faster. In some scenarios, this pans out poorly, as you can't find what you need, and the table gangs up on you before you peel away too far. Most of the time, however, you simply slowly gain the advantage you're looking for, hit a piece of bounce, then you're off to the races, which is great. Just be careful that you can transition when the heat comes on and you're fine, otherwise, curl up and don't look too threatening. Now, the other scenario for Rule of Law effects can be very, very bad. If you find that you are not the dominant control player on the table, and there is a Rule of Law in effect on the table, it can be incredibly difficult to manage your role. By in large, you play with bomb spells. When other people are resolving dorks, you're playing monoliths. When other people are cantriping here and there, you're trying to resolve a Time Spiral. When other people are interacting piecemeal with the board, you're trying to resolve an Ugin, and so on, and so on henceforth. You're a 'Timmy' deck, get used to it. While you have access to counterspells, you generally want to push the pace a little faster than a total control role (say that ten times fast) would allow you. In this scenario, if you can, counter that Rule of Law, or else you'll be in for a long, rough game. Hello Kess player, here's my soul. Please give it back when you're done...

Limiting card draw is a crap shoot vs. Teferi, and quite frankly, the second weakest of the types of locks that Teferi has to overcome. For starters, you do have a large supply of not 'draw' spells, such as Impulse, Narset, or even Teferi himself, so that's good. Second, these often come out early, while you're often drawing later, meaning, you'll have time to remove the problem before you need to draw. In rare circumstances, a Spirit of the Labyrinth comes out at exactly the wrong moment, and causes you significant headaches getting it out of the way so that you can pop off a Twister or something, but, for the most part, this is not a huge problem to overcome. It's not a Null Rod, to say the least.

Search prevention cards can be another source of anguish for team Teferi, but as with draw limitation cards, these don't tend to be the end of the world for yours truly. Just get it out of the way before you cast your Transmute Artifact and you're fine. Honestly, if you're playing cEDH at a reasonably competitive level and you failed to do so, you probably deserve to lose that game, so scoop your board, shuffle, cut, and draw seven cards. In other words, don't lose track, but certainly don't fret. Maybe a Shadow of Doubt slaps you pretty hard once or twice, but it's rare, and you can stop it fairly easily.

Ahhh, the artifacts. This is the bread and butter of Teferi, and really, the entire reason for playing the deck. You get to abuse the heck out of some of the best, most explosive mana generating rocks that have ever been printed in Magic. And it's fun, trust me. I've broken the rocks section into four parts: 3-tap Rocks, Moxen, Cost Reduction, and Utility. Most of what I have to say is pretty obvious, but you might get some insight into this and that if you're just starting out with the deck

3-tap Rocks: There are those of us for whom, the best thing that ever happened to Magic, was the early synergy between artifacts and blue. If you don't absolutely love generating ridiculous amounts of mana with artifacts, then you might prefer Baral or Baby Jace. But if you're like me, and the best deck you've ever, ever played was Jon Finkel's 'Tinker' back in extended, right this way please.

So, to start off the discussion of artifacts, the 3-tappers. Run all of them, except for that one from the Egypt block. It's not quite the same. But Mana Vault, Basalt Monoloth, Grim Monolith, Thran Dynamo, and Gilded Lotus MUST ALL BE IN YOUR DECK. But why, you ask? It's actually part of the combo. The Chain Veil takes four to activate, and Teferi untaps four things, one of which needs to be The Chain Veil. Therefore, you need to be generating four plus one (4+1) mana off of three other things to make it work. Without the 3-tap Rocks, you need two separate things that tap for two, which is more difficult. The 3-tappers also help fuel some of your more rediculous things, like Stroke of Genius, or overloading a Cyclonic Rift.

Now, that said, not all three tappers are built equally. Two of your 3-tap rocks actually have combos of their own. Believe it or not, Basalt Monolith is the most practically useful artifact card in the deck. Now, you might saying, but hang on a sec, for one more mana, Thran Dynamo untaps as normal each turn. Great! You're right. But guess what? That "3: Untap Basalt Monolith" line actually forms a combo with two seperate cards in your decks: Rings of Brighthearth, and Power Artifact. The Grim Monolith also works with the Power Artifact, but, unfortunately, it's only mana neutral on the Rings, meaning it takes exactly as much mana to produce an iteration of that cycle as it generates, so while it's infinite, it won't actually get you anywhere.

The Moxen: You run three moxen and a Lotus Petal in your deck, and you shouldn't be afraid to use them. The moxen you should be running are: Mox Diamond, Mox Opal, and Chrome Mox. Personally, I find that speed is of the essence with Teferi, at least in getting off to the right kind of start, so, in general, playing out your moxen as quickly as possible is a good idea. From time to time, you'll need to watch the board to make sure that you're not accidently feeding someone's Mystic Rhemora without thought, but generally, play the moxen out early. Lotus petal, too, but you have to be a little more careful with the Petal, 'cause you only get one shot.

Now, as the game progresses, you'll find that your moxen become less useful and more irritating. As this happens, don't be afraid to use Thirst for Knowledge, or Pull from Tomorrow to get rid of surplus. I have cut Baby Jace from the list due to interference with Cursed Totem, but he's an option, too, for getting rid of excess moxen.

Cost Reduction: Sapphire Medalion, Baral, Chief of Compliance, and Power Artifact are the three big ones, and they really shouldn't come off your list. Remember, fundamentally, you're a combo deck with enough counterspells to make a Morphling blush. Absolutely anything you can do to reduce the cost of 'going off' should be considered an essential component to your deck building ethos. Side note: Etherium Sculptor is definitely the exception to this rule. It's just not strong enough to make the cut. Further side note: Many, many Teferi decks run Dig Through Time. Mine does not. This is based on a decision to cut the fetch lands and Baby Jace out of my deck for one or more reasons. If you are still running at least the fetchlands, Dig Through Time is a very reasonable card. At a three card delve, it is strictly better than Pull from Tomorrow.

Utility: Really, the big message that I wanted to get out with this section is to put Expedition Map into your deck. It's good. My experience has been that I actually reach for any of the six, mana-producing non-basic lands as often or more than I go for the Tabernacle. This card enables you to run a small toolbox out of your land, and can be found off a Trinket Mage. Trust me. It's good.

Next, let Thought Vessel be your guiding stone as the best rock that doesn't make the cut, and only include a mana-producing artifact in your deck if its better than Thought Vessel. This should leave a pretty narrow section of mana rocks left. In my version, the only three rocks that make the cut after my 3-taps and my moxen (besides Sol Ring and Mana Crypt), are Mind Stone, Fellwar Stone, and Prismatic Lens. Mind Stone for the draw, incase you have a Mystical Tutor and you need the card right then and there, and the other two because they are virtually guaranteed to produce blue mana on demand. Thought vessel is cute, but especially now that I'm not even running the Pull from Tomorrow, it just doesn't make the cut. Sorry Cold-Steel Heart and Worn Powerstone, that means you guys too...

Also, before we quit this section, people have asked me about whether I'll be running Manifold Key when it comes out with M20. That is an emphatic yes, yes I will. Manifold Key is better than Voltaic Key, and doubling up on something that lets us abuse our 3-tap rocks is an excellent idea. The card increases access to Mox Opal, and takes pressure off our Trinket Mage to get a Voltaic Key. At present, I cannot think of a good reason not to run Manifold Key.

Regardless of how 'aggressive' a deck can or cannot be, careful consideration must always be employed when choosing which creatures make the cut in a cEDH build, and which do not. In Calgary, we have a slightly heavier, creature-based meta-game overall, with a genuine lean towards slower, more stable combo decks, such as Yisan and Sissay, mixed with the usual run of Food Chain X builds, and plenty of Thrasios and Tymna. Overall, my approach to creature selection follows two general criteria: 1) Make choices which do not self-harm, and 2) make choices which enhance flexibility. With that in mind, here's the full rundown as well as an explanation of why it's in the deck, and what you can do with it when you draw one. Here we go!

Trinket Mage There's really not enough that can be said about how effective Trinket Mage is in cEDH. The range of cards this guy tutors for is believable, including: Mana Vault, Voltaic Key, Expedition Map, and Sensei's Top, to name a few top choices in your deck alone. Add to that that he's a 2/2 body that easily crushes your opponents mana-dorks, and suddenly you've got the makings of one of the best, blue tempo creatures in cEDH. There is local joke around the Calgary cEDH environment that Trinket Mage is the most aggressive creature in cEDH. You know it's a joke, but is it really that far off? A lot of us out here don't think so...

For best effects with the mage, unless you absolutely feel you have to, avoid playing the mage until you can also play the card he Tutors for. I can't tell you how many times a Wheel effect gets played in response to early tutors, so be prepared for this, and play around that Twister.

Tribute Mage Trinket Mage's slightly bigger brother, the range of cards Tribute Mage tutors for you is much more limited than Trinket Mage, however, they are much more powerful as well. So strong, in fact, that we're testing this guy out here in Calgary despite leaving just two main targets for him to find in your deck: Cursed Totem and Grim Monolith. Here's how it works: Unless you desperately need the Monolith, you use Tribute Mage to get the Totem. Why? Because it's the best way to fight back. Period. In a proper, healthy cEDH meta-game, you will see plenty of cards that Cursed Totem outright stops that will absolutely cause you headaches if you have no other option. Maybe Sigi's out there reading this somewhere to back me up, but in my opinion, the two most challenging generals you will face with easy_T are Yisan and Sissay. Why? Between them, they have, by far, the greatest access to 'Null Rod' effects, and those will just shut you down outright. Yisan is especially nasty with that new 2/2 Null Rod walking around, and they will not hesitate to drop it in on you the first moment they can. Yisan's effect is also uncounterable, meaning that, with a Grafdigger's Cage, or a Cursed Totem, you literally do not have an out to manage this general. Add to the mix that both of these generals are each packing the run of: Carpet of Flowers, Priest of Titania, and Gaea's Cradle, and you can easily see how both Yisan and Sissay's power levels each stack up very well vs. you.

Spellseeker This is your all purpose 'Trinket Mage', but for spells. You should be running her without consideration, as the range of cards she can find is astounding, and she provides another body on the field to help block for Tezzy or Tef, depending on what's going on. Obviously, she's predominantly a context-based creature, but even without a reasonable context under which to cast her, she still gets a notable range of cards that you simply may want access to because of how strong the cards are. Like Mana Drain, or Transmute Artifact, for example. Side note, it took me a little while to realize that she gets High Tide for you. Keep that in mind, as High Tide is one of the more explosive combo lines available to a Teferi player.

Gilded Drake One really can't say enough about how effective Gilded Drake is in cEDH. For example, for all the hate that Sissay and Yisan can send our way, we can just take their general and effectively knock them right out of them for doing so. Be a little bit careful in how you deploy the Drake, though, as it's important to remember that he flies, and you don't have a single flyer anywhere in your deck to stop him. So, with that in mind, try to avoid loosing a Gilded Drake while hanging onto a Teferi for future considerations (using the top ability). The Drake will wreck three of the four Planeswalkers you run with little you can do to stop it. That said, you do have bounce spells, which are by far the most effective way to deal with your own Drake. For anyone who doesn't know, the bounce spells will return the Drake to your hand, not your opponents, which will allow you to recast the Drake as you see fit.

Baral, Chief of Compliance Baral is arguably the most generally useful creature in your deck. His passive cost-reduction ability is excellent, as you run a high number of instants and sorceries in your deck, and being able to cast them for less, or for greater effect (Stroke of Genius) is incredibly valuable. That said, his secondary passive ability, where you can 'Loot' upon successfully countering a spell is also phenomenal. This not only helps you sculpt your hand to suite your board state, but is an effective way to get rid of unwanted moxen drawn late in the game. And lastly, that 1/3 body is deceptively big, especially in this format. A single Baral can help preserve the longevity of any number of Planeswalkers you have on your board, which is an excellent idea for helping win the game.

Snapcaster Mage If Baral is the most 'generally' useful creature in the deck, then Snapcaster Mage is the most 'specifically' useful card in the deck. Why? This guy let's you replay that one spell you really need access to, one more time. Be careful with your own Grafdiggers Cage, but other than that, the range of what Snapcaster can do in a given situation is incredible, so do it. One thing to note is his 'Flash' ability. Unless you really have to main phase this guy, you should really exploit that 'Flash' as often and consistently as possible. One thing the amateurs don't talk about is how many times Snapcaster Mage gets to kill Dark Confidants because of your opponent getting greedy. Or, here's another one for you to try. On attack, flash in your Snapcaster Mage as a blocker, giving the Rapid Hybridization in your graveyard flashback. Then, before damage, hit your own Snapcaster with that Rapid Hybridization, effectively turning him into a 3/3. You have now successfully prevented damage to a planeswalker for at least two straight turns, and possibly much longer, as your opponent now has to figure out a way to remove a 3/3 from the board to get at your Teferi. You're welcome.

Gas is the gas. It's the 'go-juice' that gets you from point 'a' to victory. You run a fair amount of gas, most of it essential. Ostensibly, there are two types of cards that fit this category: Wheels and torque.

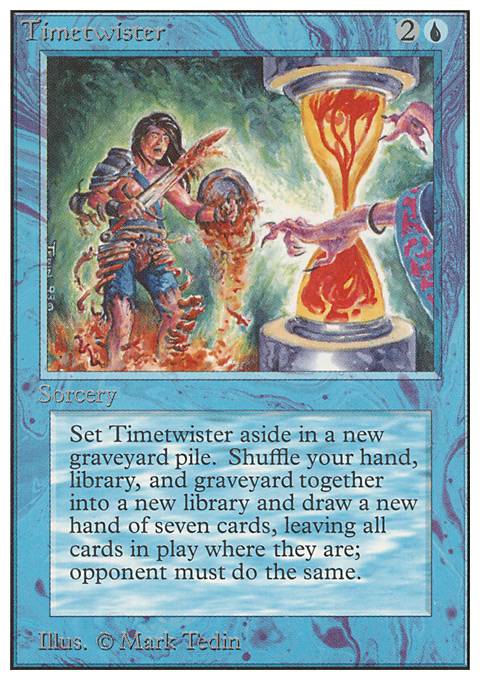
Wheels Wheels are the cards that say 'each player draws 7', plus your Windfall. From a cost to volume point of view, there are no better cards in the game for mass draw. The trouble with wheels is that everyone gets to draw, and usually the same amount of cards, so you have to be careful. Other than that, wheel away. Time Spiral is the most powerful one, but the Twister is way cheaper. Furthermore, both the Twister and Spiral have the added bonus of wreaking havoc on people's graveyards, hands, and top decks, so try to pay attention to some of the harder to spot contextual points of your game to fully maximize their effect. When using Intuition to grab your three wheels, offer the pile to the opponent with the fewest cards in hand to increase the likelihood of a Windfall, offer the pile to the opponent with the most amount of cards in hand to increase the likelihood of a Timetwister. You will very rarely get a Time Spiral off an Intuition, so you'll have to plan a little differently if you're specifically looking for that one.

Torque Torque is the name given to those really cheap, low end, draw a couple of cards, maybe re-arrange the top of your library kind of effects. Essentially, they're in there to help square up your opening hands. After the first few turns, or with other options in place, these cards can easily be discarded or removed from the game to help fuel moxen that you 'need' to play, or to act as RFG fodder for something like a Dig Through Time. There are some staples, there are some less good ones, and there are some metagame choices. I think that, overall, there isn't too much to say about this category except that about five need to be in your deck, and that some (Git Probe, Sleight of Hand) may honestly come down to a personal preference. My five are: Brainstorm (still one of the best, even without the fetches), Preordain, Ponder, Sensei's Divining Top, and Impulse.

Other than that, there are a fair amount of tutors in the deck, but not too many. As much as Teferi is a combo deck, he still wants to play a little more fluidly then just tutoring the win and hoping for the best. Ideally, you want to play at least a bit of cat and mouse to get your opponents into some uncomfortable positions for you to capitalize on. If you tutor too aggressively, you can easily become the target, and you're not really the best deck in the format with three other people coming after you. No one is. Keep your hand close to your chest, and keep on eye on the board for anything that cuts options out from under you, but overall, you really only want want your Mystical Tutor, your Merchant Scroll, and a Spellseeker for card tutors, then you want your Transmute Artifact, your Reshape, and a Whir of Invention for finding rocks. Don't be afraid to transmute your Muddle in the Mixture either. In many, many situations, either the Monolith or the Totem that you get from it is exactly what you need.

Oh yeah, I almost forgot. Trinket Mage is a star candidate for the best creature in cEDH. He should never be cut from your deck.

Good ol' blue. Nothing beats blue. Well, actually, lots of stuff does, so you better be prepared. I'm going to start this section by discussing the counterspells you should be running, and which to avoid. Then, we're going to talk about the removal package, including why I'm not running Chain of Vapor. Finally, I'll quickly cover the 'honourable mentions' and briefly explain why I cut them for something else. Ready?

Counterspells The bread and butter of any good, mono-blue deck, is the counterspells. Without these, you are at a stunning disadvantage. I'm not kidding. There are a great deal of spells in cEDH that are detrimental on resolution, and need to be stopped. Countering something is not only the best to do this, but generally mono-blue's only way to do this, and the colour's best method of achieving interactive parity, a complex way of saying: one for one removal. Yes, you read that right. You aren't Baral, so get the Spell Pierce out of your deck. I'll explain below.

So, in my experience, ten counterspells is a good, round number to start with before you begin tweaking to suite your individual play-style. My ten counterspells are: Counterspell, Mana Drain, Force of Will, Negate, Remand, Muddle the Mixture, Swan Song, Mental Misstep, Flusterstorm, and Dispel. These ten counterspells are broken into two categories: Hit them counterspells, and protect me counterspells, and with the exception of Force of Will, can be determined based on their cmc. While all ten counterspells can certainly hit the opponent, Swan Song, Dispel, Flusterstorm, and Mental Misstep, at only 1cmc apiece, are the four 'protect me' counterspells that I'm running; as the primary, planned purpose for each of those counterspells is to add depth in the counter war to win the game. Now, here is a brief explanation of how each of the four 'protect me' counterspells came to stay in the deck, and why I'm not running Spell Pierce.

Swan Song: Besides the obvious power-house cards, such as: Counterspell, Force of Will and Mana Drain; Swan Song is arguably the best counterspell in your deck. It is a 'hard-counter', and has the greatest range of targets at 1cmc out of all other 1cmc counterspells in your deck. So what they get a 2/2 Bird token. Honestly, nine times out of ten, you're going to win or lose on the turn you resolve Teferi, a 2/2 flyer isn't that bad, and many, many times, this Bird token will actually harass any other Planeswalkers on the table, amking them a riskier play. This is valuable in this format since the printing of new Narset, and the idea of using Narset wheels to punish the table. It's very hard to keep Narset alive long enough to find the wheel if she's being harassed by 2/2 flying birds.

Mental Misstep: Carpet of Flowers is arguably the second worst thing you can see after a Null Rod effect. It's one mana. It generates huge mana swings, and it completely shuts off your Winter Orb and Back to Basics effects. But despite all that, bouncing it is still a terrible idea, and you generally have no other way of dealing with it. Mental Misstep is your best out for Carpet of Flowers, if you can line them up. Otherwise, it still has a huge range of targets it can go after. The reason it's in the list of 'protect me' counterspells is because it handles Red Element Blast and Pyroblast with ease, helping you secure that 'W'.

Flusterstorm: Flusterstorm has a big range, and is capable of 'showstopping' someone dead in their tracks. It's built on the storm mechanic, which is interesting for a counterspell. On the one hand, it's a draw back, because you need to make sure that it will actually trade against what it's being used for. On the other hand, it's virtually uncounterable in this format, as not many people run Stifle, and the odds of lining one up with a Flusterstorm anyways would be extremely rare.

Dispel: Dispel is basically the trusty .38 you keep in your sock. When the chips are down and the fighting gets fierce, Dispel might be the last out you have left. Don't be fooled by the narrowness of the interaction. It hunts other counterspells, and it's the best card in the game at doing so. Don't leave home without it.

No Spell Pierce Nope. No Spell Pierce. Same for: Mana Leak, Daze, Force Spike, and... it's hard to even say it... Arcane Denial (seriously? I hope we don't need to talk about Arcane Denial...). I don't run these cards for the simple reason that none of them are 'hard counters' (Arcane Denial is, but it's terrible. Please, please, please avoid this card at all costs). A 'hard counter' is any counterspell that does not have the word 'unless'. 'If' is bad, too. But a lot of the 'if' counterspells are actually great at the purpose they serve (Mental Misstep, anyone?). The unless counterspells are a totally different story in this format, and unless you want to almost combo off, avoid anything that leaves any wiggle room. Seriously, the last thing you need is to be undermined by your own deck at the most critical moment of all. I've said it a few times in this primer, and I may say it a few more. You are not Baral, so don't build your deck like you are. Other decks can use Spell Pierce all day if they want. You want Dispel.

Other Removal The other removal in the deck is bounce, and a couple of anti-creature options. You have to be both caring and sparing in how you use these other removal spells. None of them have huge upsides, and some of them can turn around and bite you in the end. You have three bounce spells, so avoid using them unless you absolutely have to. In essence, you should only be considering the use of a bounce spell against a single target if you have the win in hand, and it's person right before you's end step. Bounce the Null Rod, and win the game. Otherwise, unless there's a Wheel effect on the stack, do not use a bounce spell, period.

Finally, you have Rapid Hybridization and Gilded Drake. Ostensibly, they are two cards which approach the same situation, but in different ways. The Drake is better, but effectively a sorcery. Also, side note, the Drake is exceptionally good at stealing lost generals. If your opponents deck requires the use of the general, Gilded Drake can straight up take that player out of the game until they can find a way to get their general back. Also, I want to point out that each of your creatures is an 'ETB' creature, meaning it does something on entering the battlefield. Don't be afraid to declare a Snapcaster Mage as a blocker, then Rapid Hybridize it, then block with the 3/3 lizard next turn. If it means saving or losing Teferi, then trust me, it's worth it.

Lands are really the bread and butter of every deck, no matter what. In Teferi, your lands are no exception to this, with a wide range of options, from the almighty Tabernacle at Pendrell Vale, to the subtle Seat of the Synod, the lands in Teferi are varied, useful, and situationally deadly, when the right time comes. While I will admit that some of my choices may seem a bit strange, there is a perfectly good and valid reason for each option, which, as usual, I will explain below.

Ancient Tomb Fast mana, for a price. Ancient Tomb is pretty self explanatory. You have 40 life, this land is exceptional for producing mana for as long as you're willing to pay the toll. Note: Teferi is capable of 'going-off' with an Ancient Tomb and either the Sol Ring, or the Mana Crypt, if that's all you have. You will have to formally 'run the loop' when doing it with Ancient Tomb, though, because the Tomb can kill you before you win, so you will have to break down the combo mathematically and into interations to see if you actually get there. Personally, I would never let the risk of dying by my own blade interfere with my will to win. If I seriously don't have it, then don't start the loop, but I would say that as long as your getting ten uses of Ancient Tomb based on life total, so, at least 22 life, you should attempt to fire off the combo through your own Ancient tomb, and then while the combo is firing, simply look for a way to get your Tomb out of the picture.

Academy Ruins / (and Buried Ruins) These are arguably the most practical lands in the entire deck for you. They has an incredibly powerful ability for what you're after, effectively making Intuition a double tutor for just three mana, and no significant drawback. I would argue that both the Ruins are actually so powerful in your deck, that you should actually consider playing either of them out early, even before you would get your traditional UU from two islands, just because of how prevalent Wheel effects are in this format. Barring rare exceptions, this is my method, based on how strong both the 'Ruins' lands are for you, and the problems they can help prevent.

Blast Zone "You mean, I can has such a thing?" Yes, yes little blue player. Now run along and go blow something up...

Blast Zone is an exceptionally powerful land card in Teferi. It shores up a number of holes in the general game plan, and does so in a way that is difficult to interfere with. Blast Zone is excellent at managing decks that run a lot of mana-dorks, but where it really shines is it's ability to punk Null Rods. Yup, you read that right. If you haven't tried it yet, this Teferi player strongly advises you to run Blast Zone, and to use the Expedition Map to find it early, in certain match-ups, because of this interaction. Without a Blast Zone in play on resolution of a Null Rod, your only other option is to bounce the card. This will work, but only for a turn. It just so happens that three out of the four Null Rod effects available to cEDH players are at 2cmc as well, so, go have some fun with that. Hmmm, now what else gets hit at 2cmc??

Inventor's Fair Inventor's Fair is another incredibly useful land for you for the simply reason that it's effectively an instant speed tutor to hand for artifacts. This is amazing as it provides with a tutor option that is far more difficult to interact with on the stack in cEDH. Except in rare exceptions, most of the time, I'd keep the land until you're ready to win. Heck, who knows, maybe even the life gain you get from this card might actually save you. Hint: read the whole card, and don't forget to gain your life.

Lotus Field Lotus Field is an interesting card that I'm willing to try. On paper, it's effectively a 3tap rock that costs nothing to cast. That said, there is the drawback of having to sacrifice two lands on entry, which may seem problematic. Therefore, you will ahve to weight the merit of whether or not to run this card in your deck from an overall sense. To me, it's worth it, but I won't run it as a land. There's simply to much going on with the card for me to just call it an island and go from there. In truth, I am replacing Winter Orb with Lotus Field to try it out. The Orb is really bugging me because of the prevalence of Gaea's Cradle in our meta, effectively making the Orb a dead card in hand. I feel that running the Lotus field gives me another card to combo with, can greatly facilitate going off with what's already in the deck, and can actually reduce the impact of Carpet of Flowers in certain matchups, making it an interesting option. I will keep you posted after some heavy testing to see if it truly fits or not in the deck.

Seat of the Synod It fetches off a Trinket Mage, is an artifact for things like Transmute Artifact, Mox Opal, or Thirst for Knowledge, and provides blue mana without feeding into a Carpet of Flowers. That said, as a nonbasic land, it is subject to every Blood Moon effect in the format, and as an artifact, it will get shut down by a Null Rod. For me, overall, the pros outweight the cons. That said, not by much, as Darksteel Citadel definitely doesn't make the cut. You choose on this one. Thirst for Knowledge and Mox Opal were significant considerations in my decision, especially the Opal.

Snow-covered Island Honestly, two reasons for snow-covered lands. 1) I use the Ice Age ones for the picture alone. They look so drab, and I've currently got my Teferi deck in these drab silverish sleeves. The whole effect is this gloomy appearance to the deck which I find suits its nature. 2) Just once, I'm going to randomly sit down at a large table, and someone else will play an Extraplanar Lens, Imprinting: Snow-covered Island, and I will be in Heaven. It'll be a Thursday, and I'll remember it forever... ;)

You really don't need snow-covered lands though, as regular islands do the same thing. One thing to note about my 'basic' lands that's a bit different is that, I don't run fetchlands in my Teferi deck. The reason for this is because of the risk of running into Root Mazes, Mindscensors, and Strangleholds. I also find that running the fetches actually does 'require' a higher land count, which then takes away from my business spells. I will probably dabble with that new basic land fetch that just came out, just for another shuffle effect for my Sensei's Top and Brainstorm, but I probably won't go back to running the four blue fetches. It's actually quite liberating without them.

The Taberacle at Pendrell Vale This is the mac Daddy of lands that are available in cEDH, and Teferi can abuse the card in a way that few other decks can truly realize. On it's own, this card places a free, uncounterable tax on every creature on the board. With either a Stasis, or a Back to Basics, this tax is deadly. As with my Lotus Field, I do not run my Tabernacle as a land from a deck building point of view, but consider it a card instead, as the land itself does not produce any mana. But other than that, holy cow, what a monster. Not that the other nonbasic lands in the deck wouldn't be reason enough on their own merit, but man, let me tell you: Expedition Map and The Tabernacle at Pendrell Vale were made for each other in cEDH.

One of the hidden gems to playing CVT is that you actually get to play with some of the most broken Planeswalkers available in the entire format. In my build, I run four Planeswalkers, with each one serving a unique role within the deck. Yes, the Planeswalkers that Teferi runs are expensive, but they are worth it. Read below for a glimpse at each Planeswalker in the deck, as I discuss both why it's in there, how I use it, and whether or not there is an alternative. Here we go.

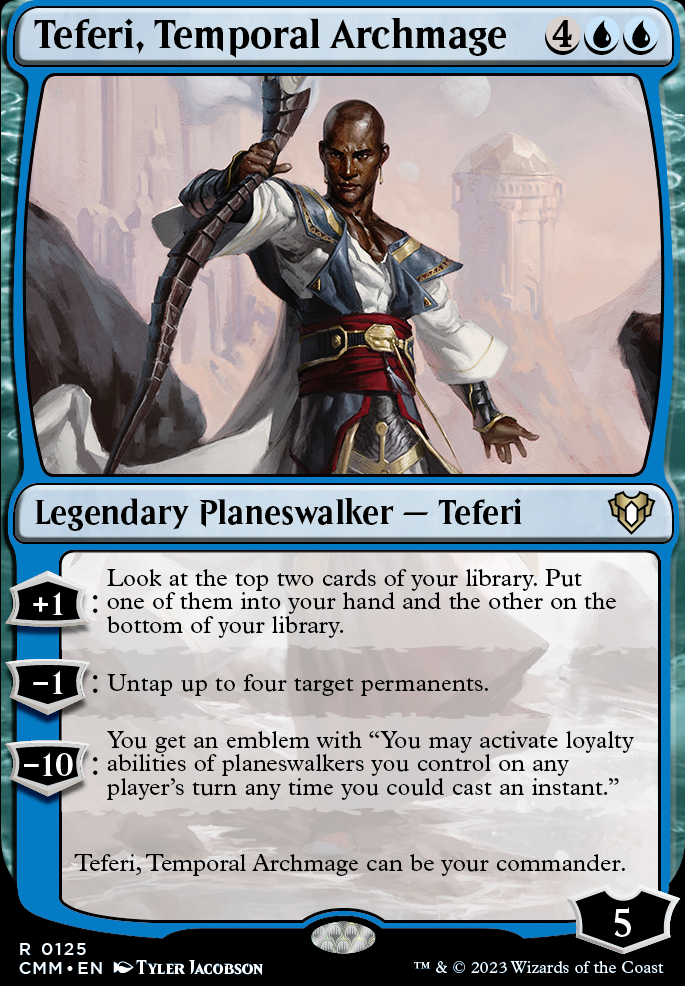
Teferi, Temporal Archmage Starting with the man himself, easy_T (EZ_T, T_money, Tef, old man Tef) is arguably the best Planeswalker ever printed. Now now, I know that everyone's got their preferences and their cases to discuss for Jace, Liliana, and Ugin (I will even make the case for Ugin as part of this write-up), but hear me out here. There is no other Planeswalker in the history of Magic, ever, who can actually generate more mana than he cost to cast, upon resolution. Teferi can, and he can sit in your general zone, to boot. Teferi is not simply the best choice to run this deck. Rather, this deck simply wouldn't exist the way it does without Teferi. There is no other comparison, and there is no other way to run a loop out of The Chain Veil. He IS the synergy that binds this particular hundred-card stack. And he's very good.

Another side to Teferi that rarely gets discussed online is that his plus ability is not only amazing, giving you a Sleight of Hand on your turn if you want, but actually avoids the stax line that prevents players from drawing multiple cards a turn as well. This means that, when you go off with Teferi, literally, nothing can stop you. Not even a Notion Thief. This is an incredible blessing for the deck, as the last thing you need is to be interrupted during the most vulnerable phase of what your deck actually does. In general, assuming the board is safe (i.e. no creatures), and you feel you can actually resolve your boy, resolving a Teferi can break the game for you on its own, simply for drawing two cards a turn until you're ready to go off. It's amazing.

Ugin, the Spirit Dragon I was reading a few primers online a while back when I stumbled on a primer that suggested running Jace over Ugin, based on the argument that Jace could help your board state earlier through his bounce and brainstorm abilities, due to his lower CMC. I strongly disagree with this line of reasoning, and I would advise anyone thinking of this to very seriously consider how strong that -X ability actually is in a deck where the only other mass removal options are Blast Zone and Cyclonic Rift. Jace, while cheaper, simply doesn't have the power level needed to control the board the way Ugin does. In fact, simply resolving Ugin is going to cause serious problems for the rest of the table due to that -X ability. If he sticks around for even a turn afterwards, the fact that Ugin's +2 ability actually follows up directly on the heels of his -X ability is a very serious cause for concern based on the general toughness of creatures in this format. Simply put, a resolved Ugin changes the very nature of the game so dramatically that he will force the other three players at the table to gang up on him, simply so everyone else can resume playing. It's way too powerful to ignore, and that whole eight mana thing... You're playing Teferi. You'll get there, even if you use Teferi to do it. Because remember, at 6cmc himself, it's very unlikely that Ugin is going to get Teferi caught-up in his crossfire. Try it. You'll see.

Tezzeret the Seeker Tezzeret is arguably the best, combo-oriented Planeswalker that cannot be your general in the format. This is because of Tezzeret's ability to search for any artifact of your choosing by removing X loyalty counters from him. As he comes in with four counters, Tezzeret can actually search for your Chain Veil on his own, right away, which is great. Believe it or not, this is actually the cheapest way to search for and activate the Chain Veil out of all the other options in your deck.

Another line to take with Tezzeret is to use him to help set off your Rings of Brighthearth / Basalt Monolith line. This is a secondary combo line that produces infinite mana. If you can find a way to activate him again, you could go find your Sensei's Divining Top, which creates a three-card combo that can draw out your deck. Lastly, as a third option, way out in left field, if you have the Power Artifact in your hand, Tezzeret is above four loyalty, and you have any 3tap rock in play, you can actually use Tezzeret to mirror Teferi, and win the game off the Chain Veil and Tezzeret by putting the Power artifact on the Chain Veil, and then using Tezzeret's untapping ability with the Chain Veil (now costs 2 to activate), and say a Thran Dynamo. It works just as well.

Narset, Parter of Veils Without the use of fetchlands, Dig Through Time is actually much worse, and potentially unplayable. Narset is the simple solution here, and frankly the best. Over the course of two turns, she is able to virtually mimic the effect of Dig Through Time on her own, and, she has that static, draw prevention ability that actually goes a long way throughout the game. Then, as a further side-effect, again on the passive ability, if you ever happen to hit a Twister effect with a Narset in play, do it. This will effectively ruin everyone else's game but yours, and, given the margins and power thresholds of the format, drawing seven cards to your opponents combined total of three is very likely to end the game right there, on its own.

And finally, at long last, we come to the prison section of Teferi. Now, you'll notice that I used the word 'prison' to describe this section. Some younger players may use the term 'stax' for what I'm describing here. Older players, however, especially those familiar with $tack$, the Keeper busting Vintage deck of the early millenium, will appreciate the distinction. Prison cards are the 'sticky' cards that cause your opponents to squirm. Teferi gets a handful of some of the most abusive options in the game for prison cards, and he can generally deploy them at minimal risk to himself. NOTE: TEFERI PLAYERS SHOULD NEVER LOOK AT PRISON CARDS AS A WAY TO PLAY THE GAME. These cards should only be considered a stall tactic, and while they are still extremely effective, from my experience, they are rarely a 'gamelong' solution to a messy table. You will still have to work hard under a Stasis to get the win. That said, here they are, board locks and taxes...

Board Locks 'Board locks' are essentially cards that deny the opponent(s) one or more aspects of their game plan. In your deck, you have Grafdigger's Cage, Cursed Totem, Stasis, Winter Orb, and Back to Basics, with the option of Torpor Orb, in the right meta, if you choose (I find it cuts down way too many cards in the deck and doesn't stop enough, but that's just me). Each of these cards are very low impact to your deck, but potentially ruinous to other people's decks. My particular favourite is Back to Basics, but each of them is a powerhouse on their own. The only 'nonbo' that you have from any of these pieces is between Grafdigger's Cage and Snapcaster mage, which is an acceptable complication to me. As a rule of thumb, in cEDH, I try to avoid a) cards that negatively affect more than two cards in my deck, or b) cards that are negatively affected by two or more cards in my deck (Baby Jace, for example. He has trouble with both the Grafdigger's Cage and the Cursed Totem. The Totem is extremely powerful, so Baby Jace got the cut). Anyways, just some food for thought. Also, don't forget to tap your Winter Orb to power out your Whir of Invention. Best. Trick. Ever...

Tax Effects And lastly, your 'tax effects'. For me, a 'tax effect' is any card that makes you pay something to keep it around. This 'something' is effectively a tax on production, hence the term, 'tax effects'. My build runs three: The Tabernacle at Pendrell Vale, Rhystic Study, and Mystic Rhemora. None of these cards should ever leave your deck, they are each that good. For example, watch what happens to a hoard of mana dorks when you simultaneously hit them with a Cursed Totem and a Back to Basics. See where I'm going with that, or does it require a further explanation? That's what I thought...

Suggestions

Updates Add

Comments

Date added 5 years
Last updated 5 years
Legality

This deck is not Commander / EDH legal.

Rarity (main - side)

10 - 0 Mythic Rares

34 - 0 Rares

20 - 0 Uncommons

14 - 0 Commons

Cards 100
Avg. CMC 2.26
Tokens Bird 2/2 U, Emblem Teferi, Temporal Archmage, Frog Lizard 3/3 G
Votes
Ignored suggestions
Shared with
Views