”Just follow your nose for the fruity taste that shows”
The deck may be able to build a strong board presence but none of that matters if you can’t kill your opponents.
This is what the sac outlets are for. It’s not just a value outlet, it’s also a part of our win condition. Of course, how you win will be dependent on your outlet. Now let’s get into it.
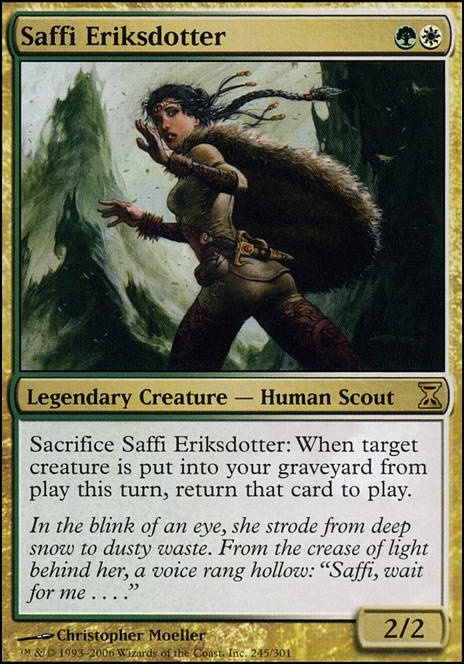
Basic Saffi Combo
Saffi’s ability opens her up to a ton of combo opportunities, and in this deck understanding the fundamentals of how this deck combos is massively important. This is just a breakdown of how the basic combo works so that you can better understand the rest of the combos underneath this.
To execute a Saffi loop you will need the following cards:
Your general. Saffi Eriksdotter
An unlucky Victim. Renegade Rallier/Sun Titan/Karmic Guide
A repeatable sacrifice outlet. Altar of Dementia/Ashnod's Altar/Greater Good.
- Have Saffi, a Victim, and a sac outlet in play.
- Use saffi’s ability targeting your victim
- Sacrifice your victim to a sac outlet.
- Return your victim to the battlefield
- Return Saffi to the battlefield with the victims ETB
You now have a loop! Once you know how to do this there are a ton of decks you can just beat by having your sac outlet be Altar of Dementia. But what about those situations where that Altar just isn’t enough?
Earthcraft Line
This combo is the bread and butter. it’s what you’re looking to set up through a variety of means. Sometimes you can sub out an earthcraft for something like an Ashnod's Altar to similar effect. Anyway, here’s the combo
You’ll need:
Earthcraft
Saffi
Rallier/Sun Titan/Karmic Guide
Mortarpod
1 Basic land
- Have Earthcraft, Saffi, and Rallier in play
- Play Mortarpod
- Tap both Saffi and Rallier to generate 2 mana with Earthcraft
- Equip Mortarpod to Rallier
- Sacrifice Saffi per her ability targeting Rallier
- Sacrifice Rallier to Mortarpod’s Ability and deal 1 damage to one of your opponents. Rallier returns to the battlefield per saffi’s ability and reccurs saffi.
- Repeat steps 3-6 until all of your opponents have died a death by a thousand cuts.
The Ulamog Line
This is by far the oddest line in the deck but is the easiest to set up due to the sacrifice outlet being tutorable off of an Academy Rector.
What you’ll need:
Saffi
Renegade Rallier/Sun Titan
Greater Good (GG)
At least 1 basic land
4 cards in hand
- Saffi, GG, Rallier
- Sacrifice Saffi per her ability targeting Rallier.
- Sacrifice Rallier to GG to draw and Pitch.
- Rallier Returns per Saffi’s ability and Reccurs Saffi Per his own ability
Steps 2-4 are the core of the combo.
Steps 5-9 can be ignored if you have two mana available or an Earthcraft already in play.
- Draw and pitch until you have Lotus Petal in hand
- Play Petal, sacrifice it for green. You now have 3 cards in hand
- Draw and pitch till you have Ulamog, the Infinite Gyre in hand.
- Pitch ulamog to reshuffle the petal into your deck
- Repeat steps 5-8 until you have 2 floating mana
- Draw and Pitch until you have an Earthcraft in your hand. Play earthcraft. You now have 1 card in your hand
Now, every time you loop Saffi/Rallier You net 2 mana.
- Draw and pitch until you hit Ulamog. Cast ulamog. Destroy whatever the most threatening permanent is. If there is a Null Rod or a Stony Silence in play hit that first. You now have 0 cards in hand
- Sacrifice Ulamog to GG. You now have 7 cards in hand.
Repeat 11-12 until all Null Rod and Stony Silence affects are off the board.
From this point on your hand is less relevant. If you start to become worried about hand size you can weave in Karmic Guide to lower your hand size.
From here you can just set up the Earthcraft Loop from before.
Pattern of Rebirth Line
Pattern lines are used as a means of assembling other combos. However, its strange enough that I believe it deserved its own section. I’m going to use a set up for it that doesn’t use any cards that cant be tutored for via creature tutors, so no altars or GG already in play. So where do we begin.
What You’ll Need
Saffi
Starved Rusalka
A disposable creature
Pattern of Rebirth
Three Green Mana
- Have all of the aforementioned things in play with Pattern on the disposable creature
- Pay G to Rusalka to sacrifice your disposable lad with Pattern on it to search for Boonweaver Giant
- When Boonweaver ETBs it will pull Pattern from the graveyard
- Sacrifice Saffi Targeting Boonweaver
- Sacrifice Boonweaver to Rusalka by paying G to find Academy Rector
- Return Boonweaver to the battlefield per Saffi’s Ability
- Sacrifice Rector to Rusalka, paying your final G. Go and find Greater Good.
- Sacrifice Weaver to Greater Good. Go and find either Sun Titan or Renegade Rallier.
- Reccur Saffi with Titan or Rallier.
- Proceed to execute the Ulamog Line
Backup Line
Oh no! Saffi was so tired of waiting that she’s gone missing and we can’t find her!
Whatever shall we do?
Well luckily enough we have a nice backup line that is pretty similar to the Saffi lines mentioned above.
Fiend Hunter Loops
That’s right, good old Fiend Hunter has stepped up and has stopped hunting fiends to help you win the game.
This loop is very similar to the basic Saffi loop. To execute it you will need:
Fiend Hunter
Sun Titan/Karmic Guide
Ashnod's Altar/Altar of Dementia
- Have Sun Titan and a sac outlet in play.
- Play Fiend Hunter and exile Sun Titan underneath it.
- Sacrifice Fiend Hunter to your outlet and return Sun Titan to the battlefield
- Return Fiend Hunter to the battlefield with Sun Titan’s ability.
Bam. It’s almost as good as the Saffi loop. You can do most of the aforementioned combos with this loop. However it does not work with with the Greater Good Line because you don’t say card neutral in hand.
Loose Ends
This section is for talking about combos I didn’t include in the combo writeup either because they don’t win on their own or because they’re meant to set up a combo out of the combo.
Ashnod’s Altar Loops
Ashnod's Altar night possibly be one of the best cards in this deck. However, as a combo piece it’s used in a largely similar way to Earthcraft. The main difference is that this is also a sac outlet. Just sub this out above whenever you see Earthcraft being used and it ends up being a similar result.
Evolutionary Leap/Skullclamp
These two cards are interesting. They’re both incredibly good at what they do, but neither of them win the game. Because of this they’re both used in place of Mortarpod in Mortarpod combos to find Mortarpod.