Most of the material here comes from sources other than myself. My hope is that this gathers a wealth of information from multiple sources and locations, brings it to one place, and presents it in an organized format.
Use Sliver Overlord, Homing Sliver, and tutors to pull specific cards from your library.
Patriarch's Bidding , Yawgmoth's Will, and Volrath's Stronghold will bring key cards in your graveyard back into the game.
Mana Slivers:
Manaweft Sliver
Gemhide Sliver
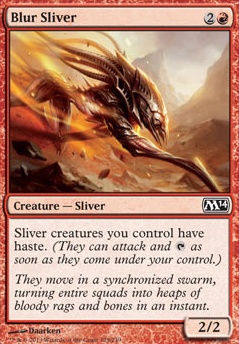
Haste Slivers:
Blur Sliver
Heart Sliver
Cloudshredder Sliver
Firewake Sliver
Sliver Combos:
Infinite Slivers:
1 Sliver Queen + (Heartstone or Training Grounds or Biomancer's Familiar) + a mana Sliver + a haste Sliver
This combo creates infinite tapped 1/1 Sliver Creature tokens and one untapped 1/1 Sliver token. Consider playing this combo at the end of turn of the player before you.
2 Intruder Alarm + Sliver Queen
+ a mana Sliver
This combo creates infinite untapped 1/1 Sliver tokens. Begin the cycle by tapping Sliver Queen and your mana Sliver to add two mana of any colour to your mana pool. Use that mana to generate a Sliver token, courtesy of the Sliver Queen. As the new token comes into play, Intruder Alarm untaps both the Sliver Queen and your mana Sliver. Repeat until you have an unstoppable army. Your newly hatched tokens will have summoning sickness unless you also have a haste Sliver in play so you may want to do this at the end of turn of the player before you.
Infinite Slivers and Mana:
3 Mana Echoes + Sliver Queen
: (Colorless Mana)
Create a Sliver Creature token using the Sliver Queen's ability. Mana Echoes generates mana for the two (or more) Slivers in play. Use that mana to generate another Sliver token. Repeat as desired. Your newly hatched Sliver tokens, while untapped, will never-the-less have summoning sickness unless you also have a haste Sliver in play so consider doing this at the end of the turn of the player before you. With a mana Sliver AND a haste Sliver in play, this combo creates infinite battle ready Slivers and infinite mana of all colours
4 Basal Sliver + Sliver Queen
+ (Training Grounds or Heartstone or Biomancer's Familiar): (Black Mana )
Having Training Grounds or Heartstone or Biomancer's Familiar in play, makes Sliver Queen's ability cost . To kick off the combo, create a Sliver token using the Sliver Queen's ability. Sacrifice the new Sliver token for courtesy of Basal Sliver's ability. Use that mana to create two new Sliver tokens (Sliver Queen) and then sacrifice them for . Make four more Slivers and so on, so forth, ad infinitum. Though untapped, they will have summoning sickness unless you also have a haste Sliver in play so consider doing this at the end of the turn of the player before you.
4a Ashnod's Altar + Sliver Queen
+ (Training Grounds or Heartstone or Biomancer's Familiar) (Colorless Mana)
Same mechanics as #4 resulting in infinite Slivers and infinite colourless mana.
5 Basal Sliver + Sliver Queen
+ a mana Sliver + a haste Sliver: (All colours of Mana)
Create a 1/1 Sliver token (via Sliver Queen's ability). Having haste, you may immediately tap the new token for one mana of any color and then sacrifice the token for (Basal Sliver's ability). Use the to create another Sliver token... rinse, wash, repeat. Once you have infinite mana, use the Sliver Queen’s ability to create infinite untapped Slivers with Haste.
6 Combo #1, #2, #3, or #4 + Gaea's Cradle: (Green Mana )
Make infinite slivers and then Gaea's Cradle for infinite
Infinite Combat Phases and Mana:
7 Aggravated Assault + a mana Sliver + 5 other Slivers
A minimum of five other Slivers because you need one to attack. Manaweft Sliver/Gemhide Sliver lets all Slivers produce one mana of any color, and Aggravated Assault's ability untaps all of (only) your creatures and establishes a second Combat Phase. As long as you keep your five Slivers ready you can do this as long as you need. This combo can also be used to generate infinite mana of all colours.
7a Aggravated Assault + a mana Sliver + Sentinel Sliver + 3 other Slivers
Infinite Life:
8 Combo #1, #2, #3, #4, or #5 + Darkheart Sliver
Create infinite Slivers. With Darkheart Sliver you can sacrifice those Sliver tokens to give yourself infinite life. Then create infinite Slivers,,, again
Infinite Card Draw:
9 Combo #1, #2, #3, #4, or #5 + Dormant Sliver
10 Basal Sliver + Dormant Sliver + Sliver Queen
Start by creating a Sliver token via the Sliver Queen’s ability. Dormant Sliver’s ability requires you to draw a card as the token hits the battlefield. Sacrifice the token for ,,, Rinse, Wash, Repeat. You can potentially draw out your whole deck and find a means of winning on that turn.
Permanent Destruction:
11 Combo #1, #2, #3, #4, or #5 + Necrotic Sliver
Necrotic Sliver's ability only costs with Training Grounds or Biomancer's Familiar on the table; with Heartstone out, it costs . You can sacrifice any number of the infinite Sliver Tokens with any amount of the infinite mana to destroy as many permanents as you desire.
12 (Sliver Queen or Brood Sliver or Sliver Hive) + (Harmonic Sliver and/or Constricting Sliver and/or Necrotic Sliver)
Create a Sliver token with Sliver Queen, Brood Sliver, or Sliver Hive. Harmonic Sliver causes all Slivers, upon entering the battlefield to destroy an enchantment or artifact. You might want to have Hibernation Sliver around to bounce Harmonic Sliver before your own enchantments and artifacts are targeted. Constricting Sliver allows the option to temporarily exile a creature. Necrotic Sliver allows you to sacrifice a Sliver and pay to destroy a target permanent. Remember; if you sacrifice a Sliver you used to exile an enemy creature (via Constricting Sliver’s ability), said exiled creature will bounce back to the battlefield.
Creature Stealing:
13 Sliver Overlord + (Amoeboid Changeling or Unnatural Selection)
(Ensure Crystalline Sliver is not in play as it provides Shroud to targeted Slivers)
Amoeboid Changeling or spend to activate Unnatural Selection’s ability to turn any target creature into a Sliver. Then pay to activate Sliver Overlord's ability to take control of target Sliver. There is no specified length of time on the ability, so even if it ceases to be a Sliver or if you lose the Overlord, the stolen critter is still yours. Using Unnatural Selection allows multiple thefts per turn.
Infinite Power and Toughness:
14 Combo #1, #2, #3, #4, or #5 + (Sliver Legion or Coat of Arms)
Create infinite Slivers. Sliver Legion gives every Sliver +1/+1 for each other Sliver in play.
Creature Destruction:
15 (Striking Sliver or Bonescythe Sliver) + Venom Sliver
First strike or Double strike combined with Deathtouch is a devastating attack. First Strike damage resolves before combat damage even begins, so when your opponent is attacking or blocking, the creature unfortunate enough to be the Sliver's target will receive First Strike damage first, which happens to be Deathtouch damage.
16 (Thorncaster Sliver or Acidic Sliver or Cautery Sliver) + Venom Sliver
ANY damage done by a creature with deathtouch is enough to destroy the defender. Thorncaster Sliver allows all Slivers to deal 1 damage to target creature or player whenever they attack. Combo with Venom Sliver, and it is a death sentence for the targeted creature.
Force Protection:
17 Crystalline Sliver + Root Sliver + Sliver Hivelord
All Slivers gain Shroud, Indestructible, and cannot be countered. The only thing that can affect them is mass exile. Use Hibernation Sliver and Sedge Sliver to protect Slivers from exile, destruction, poison, etc. Even if you do not have Root Sliver on the board, Sliver spells still can not be countered if you use Cavern of Souls in their casting.
Player Destruction:
18 Lavabelly Sliver + Sliver Queen
+ (Basal Sliver or Ashnod's Altar):
Pay to activate the Sliver Queen's ability to create a Sliver token. That token will inherit Lavabelly Sliver's ETB effect, allowing you to target a player (or Planeswalker) for 1 point of damage while gaining 1 life for yourself. Sacrifice the token to trigger Basal Sliver's ability to generate which you will use to again activate Sliver Queen's ability, triggering another activation of Lavabelly Sliver's ability. Repeat the cycle of creating and sacrificing Sliver tokens until all opponents are eliminated.
19 Combo #1, #2, #3, #4, or #5 + (Lavabelly Sliver or Acidic Sliver or Cautery Sliver)
20 Combo #1, #2, #3, #4, or #5 + Purphoros, God of the Forge
Create infinite Sliver tokens. Purphoros, God of the Forge deals 2 damage to each opponent for each Sliver created this way.
21 Combo #1, #2, #3, #4, or #5 + Throne of the God-Pharaoh
Create Slivers and so on, so forth, ad infinitum. Tap your Slivers to attack, create mana, etc. A mana Sliver and/or a haste Sliver may need to be included in the combo. At the end of your turn Throne of the God-Pharaoh deals infinite direct damage to each opponent.
22 Blasphemous Act + Sliver Hivelord + Spiteful Sliver
This one works to destroy Planeswalkers and/or opponents
22a Blasphemous Act + Spiteful Sliver
23 Horned Sliver + Sliver Legion
Power ramp combined with Trample
Play all Slivers in one turn:
24 (Intruder Alarm or Paradox Engine) + Sliver Overlord + a mana Sliver + a haste Sliver
Intruder Alarm causes ALL creatures to untap each time a creature comes onto the battlefield. Use Sliver Overlord's first ability to pull your Sliver of choice from your Library. Manaweft Sliver/Gemhide Sliver enables all Slivers to create mana of any colour. The haste Sliver allows the new Slivers you put on the battlefield to immediately add to your mana pool. If you have the resources and are smart about how you develop your battlefield, you can play all your Slivers in one turn. (Note: Paradox Engine was banned from the Commander format in 2019)
25 Mana Echoes + Morophon, the Boundless + Sliver Overlord
Morophon, the Boundless lowers the cost of each Sliver by , so the only remaining costs to cast your Slivers are for the generic mana. You will need mana to kick off the onslaught. (Mana Echoes provides at least on the turn you play the second of Sliver Overlord or Morophon, the Boundless). Once Sliver Overlord and Morophon, the Boundless are in play. tutor for Crystalline Sliver (for protection) followed by all of the Slivers and Cloudshredder Sliver (for haste). Each of these will net positive mana from Mana Echoes as they come on to the battlefield which you can then use to pay the generic mana costs as you tutor out the rest of your hive.
26 Intruder Alarm + Morophon, the Boundless + Sliver Overlord
+ a mana Sliver
your 3 Slivers for to use Sliver Overlord's ability to tutor for Crystalline Sliver (for protection). Cast Crystalline Sliver at no cost (thanks to Morophon) to trigger Intruder Alarm and all your Slivers. Repeat the process to bring out all of your Slivers and Cloudshredder Sliver (for haste). You will then be able to tap Slivers as needed to being out every Sliver in the deck.
Return From Exile:
27 (Unnatural Selection or Amoeboid Changeling or Arcane Adaptation) + Hibernation Sliver + Riftsweeper
Riftsweeper brings ANY card back from exile and places the card in its owner’s library. Change Riftsweeper into a Sliver and bounce her back to your hand via Hibernation Sliver’s ability. Rinse, wash, repeat as needed.
Sliver Token Generation:
28 Bonescythe Sliver + Brood Sliver
Definition of the Combat Damage Step: "All creatures in combat deal combat damage at the same time, except when one or more creatures have first strike or double strike. In this case there are two damage assignment steps." With Double strike, you have two damage assignment steps when dealing combat damage to a target player, therefore you get one sliver token per damage assignment step. Work this concept into Combo #7/7a, and it potentially becomes a Queenless wincon by creating infinite Sliver tokens and infinite mana of any colour.
Play All Slivers For Free
29 Fist of Suns + Morophon, the Boundless
This little combo lets you cast all the Slivers in your deck, for free. Fist of Suns modifies the casting cost of your Slivers to . Morophon, the Boundless then reduces the casting cost by for a final cost of . Adding Future Sight to the combo allows you play any Sliver on the top of your library for free! This combo would work in ANY Tribal deck.


![Krenko's Goblin Swarm [Primer] thumbnail](http://static.tappedout.net/chart/0-0-0-100-0-small.png)
![Krenko, Mob Boss feature for Krenko's Goblin Swarm [Primer]](http://static.tappedout.net/mtg-cards/magic-2013/Krenko-Mob-Boss-cropped.jpg)
![The Old Mill Scream [Primer] thumbnail](http://static.tappedout.net/chart/0-80-20-0-0-small.png)
![Swamp feature for The Old Mill Scream [Primer]](http://static.tappedout.net/mtg-cards-2/DFT/swamp/regular-1737637478.png)