So the main idea of this deck is hit a critical mass of draw spells and mana until you can pivot into one of the combos mentioned above and close out the game. The real question, is what does a "critical mass" really
mean. Really, it's when you can soft-generate enough resources, between ritual spells and draw spells, that your "chance to whiff" approaches 0. Anyone who has played a traditional storm deck knows the feeling of what I'm talking about. Basically the prospect of hitting critical mass has two main barriers; you need to draw lots of cards and generate lots of mana.
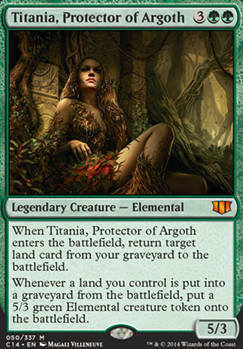
Most of the resources that this deck makes to hit critical mass come from two key cards: Sylvan Safekeeper and Gaea's Cradle. If you have access to both of those cards, you can create a very large number of 5/3 elementals and a good amount of mana per tapping of Gaea's Cradle. The first question I asked myself in regards to Titania, Protector of Argoth, is how is she abusable in a way other cards are not. The answer, I've come to discover, is the innately high number on the left side of the / that the tokens she generates has. This enables a lot of really strong draw power that green has access to that token decks usually can't take amazing advantage of. Casting Life's Legacy on a 1/1 saproling token feels very bad. It feels considerably less bad on one of the 5/3 elemental tokens that Titania, Protector of Argoth generates a surplus of. So right away the biggest apparent angle she hits that most token decks don't is tokens that come onto the battlefield with good raw stats. No other token deck makes Greater Good the one-card wincon it is in this deck because of this. So that's the answer to the first problem, anyways. How do we consistently draw cards with which to hit critical mass? Drawing 5 cards off of reasonably costed green draw spells.
So the second issue, generating the mana, does tend to be solved by Gaea's Cradle every game, but there is some nuance to it. You generally need a large amount of mana to start chaining through your deck which means you often need to lead with sacrificing lands and tapping the Gaea's Cradle or even not having it out when you start and hoping your consistency will draw you through it as you start comboing. This leads us to the issue of what do we do after we've drawn a bunch of cards but we're low on mana? There are actually a couple of answers to this question. The first, which I've hinted at earlier, is multiple activations of Gaea's Cradle itself. This is accomplished with untapping effects such as Candelabra of Tawnos or by sacrificing it and replaying it using such cards as Ramunap Excavator and Exploration. To be able to use these effects from a low mana pool you can draw through the mana-positive rocks such as Mox Diamond which will often give you just enough of an edge to start some of these interactions and push your mana pool into the red-cough-Green Zone. The second answer to this problem lies in one little snek. Lotus Cobra is your best friend and when you sacrifice all of your lands and cast Splendid Reclamation with him on the battlefield things get out of hand (perhaps onto the battlefield?). Often times I will use both of these strategies together to get past the breaking point and hit an infinite combo.
So now that we have learned what strategies to use to start going off. What exactly are we looking for through our deck that's going to close out the game? The easy answer is that the two infinite combos above will both do it very solidly. Really, however, there are a few key cards that you're specifically digging to that you can't normally tutor out. The short-list is Food Chain, Greater Good, and Finale of Devastation.
I know Food Chain is an integral part to one of the two combos, but it's just worth mentioning how effective it is at just winning you the game when you chance into it. (The chancing gets easier when you draw 40 cards on your turn).
Greater Good will take the path you are on of storming off and make it effectively infinite. With a maximum required number of 20 tokens, you can literally draw through your entire deck (NOTE: This is why we include an Eldrazi Titan), discarding the lands until you hit a World Shaper and a Lotus Cobra and... I'm sure you see what's happening here.
Finale of Devastation will just turn 12 mana into pretty much an instant soft win with Craterhoof Behemoth and that tends to be good enough to include it on the short-list here.
So that pretty much covers it for how the deck innately storms off and what general paths you're looking for on your storm turn are. There are a few other interactions and cards worth mentioning here, however.
Bonus Tech:
Starting where we left off with Finale of Devastation, if for some reason Hoofin' It (tm) won't get you there, and you have a draw spell in hand your best target is actually Devoted Druid. When you give it +10/+10 and haste you can actually just turn that into an instant 12 and get your mana back for the Finale of Devastation, effectively giving all of your creatures on the battlefield the +10/+10 and haste for completely free. Casting cards like Life's Legacy after you do that is completely game-breaking.
Sylvan Safekeeper can respond to the etb triggers on Regal Force and Craterhoof Behemoth by sacrificing additional lands after the trigger is on the stack and as such you don't have to sacrifice your lands before the spell resolves and get yourself blown out.
Tooth and Nail can use the above interaction start a storm-turn very effectively by searching out Woodland Bellower and Regal Force. You can then stack the triggers in such a way that Woodland Bellower searches for Sylvan Safekeeper who will then sacrifice some quantity of your lands to draw a bunch of extra cards off of the Regal Force trigger.